Building a 1:1 chat app
This guide is for building a modern full stack web application. We will be using SST (serverless stack) to deploy both frontend and backend from one folder.

Requirements:
- minimal understanding of TypeScript, React, and AWS
- an AWS account
Check out this guide if you don’t have an AWS account
I really like the idea of 1:1 paid communication, something like Premium.chat. Let’s start building.
Check the live website: DropinTalk
Check the code: github.com/gty3/dropintalk
Part 1 - Getting started with Next.js and SST
Create a new project:
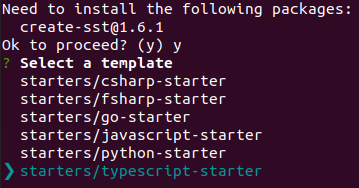
npx create-sst@latest --minimalI’m choosing typescript and calling my project Dropintalk.


The CLI says to start the app but it doesn’t matter, we just need to open the project.
cd dropInTalk
code .
So we have our serverless stack created, we need to create our frontend Next.js application inside of it.

npx create-next-app@latest --tsWe’ll call it ‘frontend’, this will be referenced by our SST stack.
Now we need to install @sls-next/lambda-at-edge to make our Next.js deployments work in SST.
npm install @sls-next/lambda-at-edgeYour workspace might look slightly different, I’ve remove the vitest package as well since we don’t need it. Here’s how my package.json looks:

Let’s connect our frontend to our serverless stack.
MyStack.ts should look like this:
import { StackContext, NextjsSite, Api } from "@serverless-stack/resources";

export function MyStack({ stack }: StackContext) {

  const api = new Api(stack, "Api", {
    routes: {
      "GET /": "functions/lambda.handler",
    },
  })

  new NextjsSite(stack, "NextSite", {
    path: "frontend"
  })

  stack.addOutputs({
    ApiEndpoint: api.url
  })

}
We’re adding new NextjsSite and referencing the folder we created previously - frontend.
We import theNextjsSite construct from serverless-stack resources. Docs
This allows us to deploy our NextjsSite using AWS resources.
Now let’s run, npm i, then npm start


The serverless stack is up and running locally, let’s get the frontend running, open another CLI, and cd to the frontend folder.
cd frontend/; npm i; npm run devLet’s open up our browser and head to localhost:3000. Our Next.js site is now hosted locally.

Now it’s time to make a rudimentary landing page.